![]()
![]()
![]()
![]()

![]()
![]()
![]()
![]()
![]()
![]()
![]()
![]()
![]()
![]()
![]()
![]()
|
|
|
|
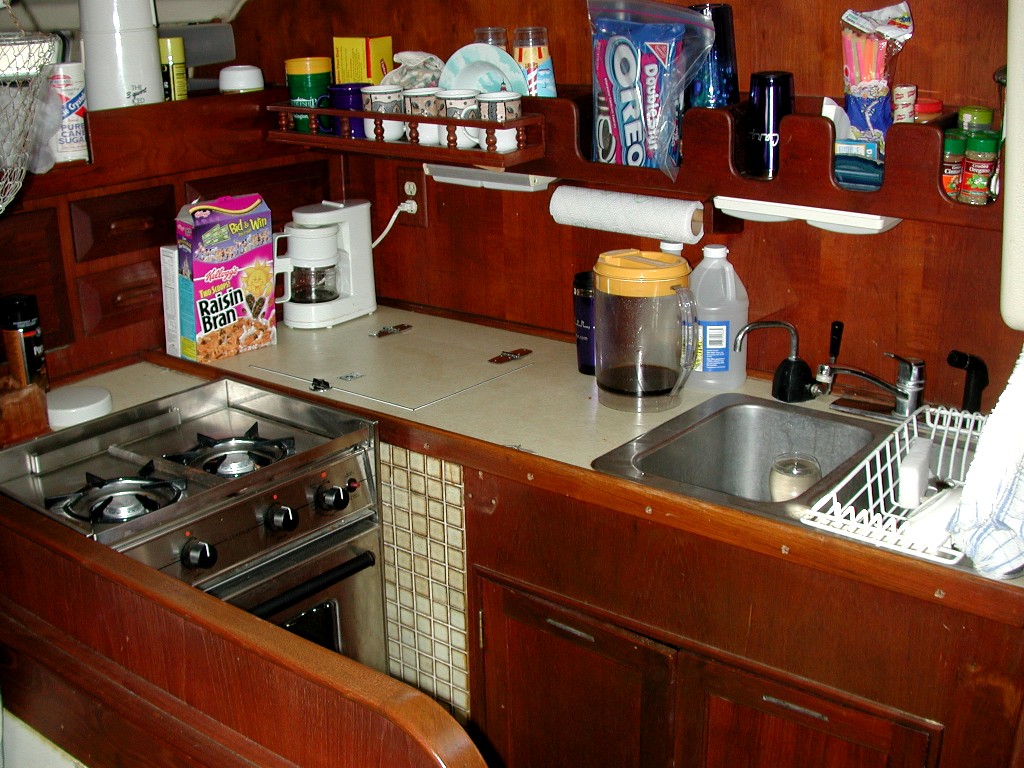
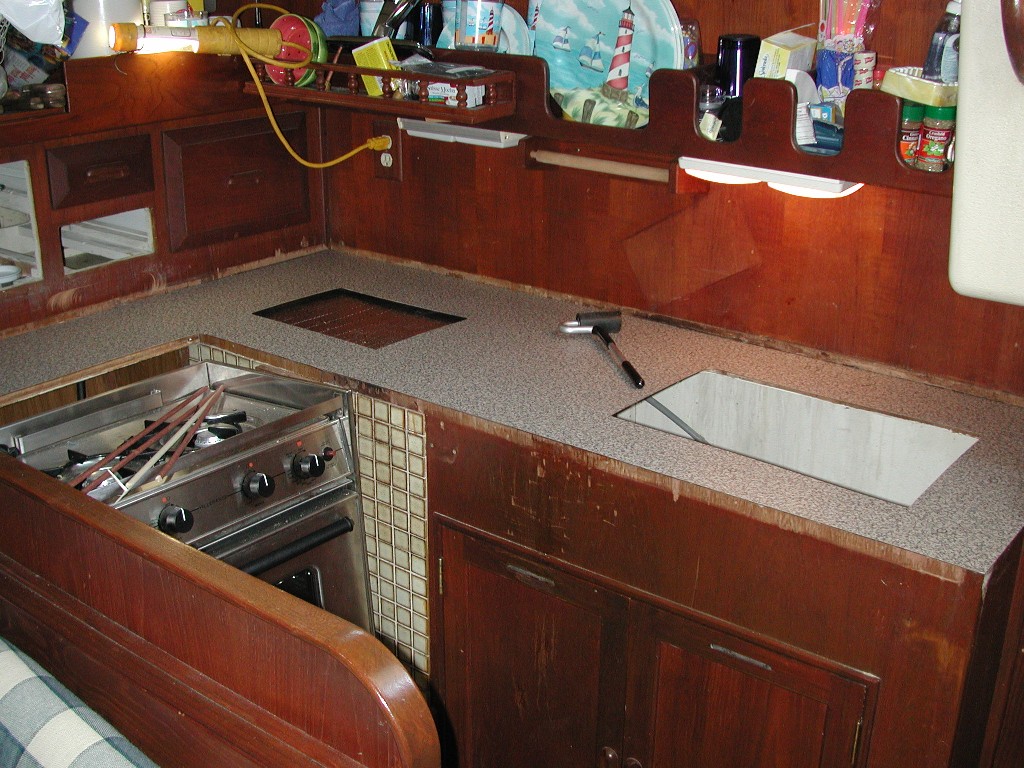
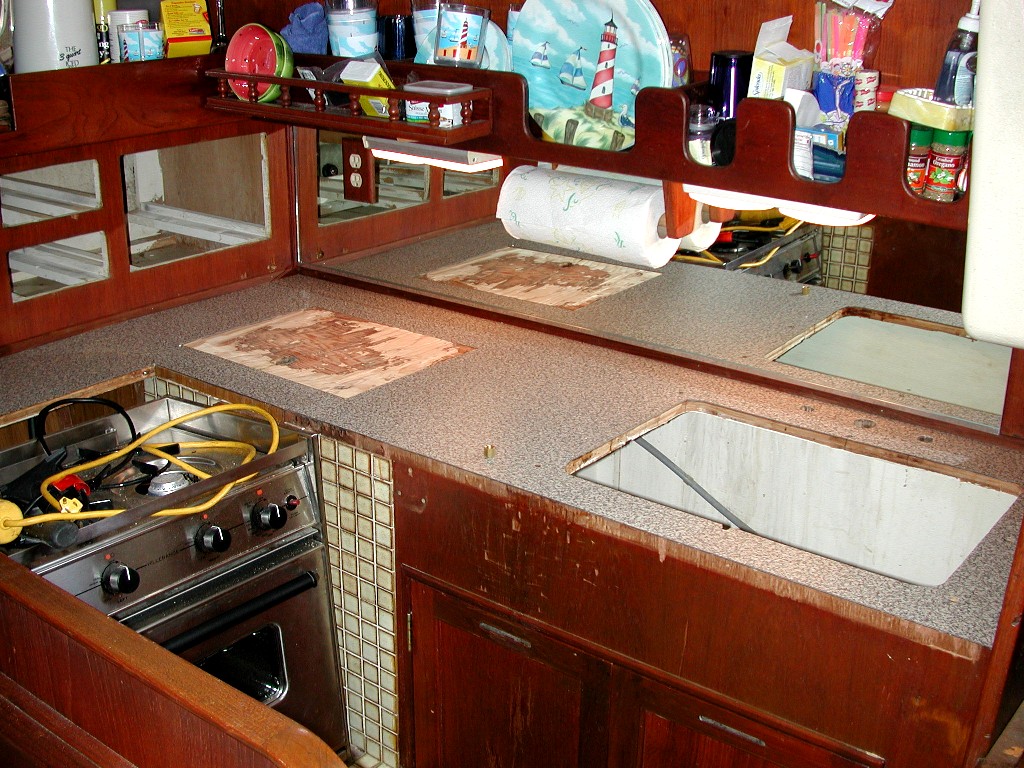
Alright. lets face it - after 25 years I can not think of a kitchen that could not stand to be updated! Granted, when I purchased Annabelle, I took out the alcohol stove and diesel oven and replaced them with a propane two burner stove with oven. I also added a microwave, but beyond that the galley had not been touched. I am pleased to announce that has been corrected! This project started out with "how do we make the galley brighter?". The first thought was to paint the wall behind the sink white to reflect more light - but this was scrapped for a more classic touch of adding a mirror behind the sink. A mirror was ordered, complete with cut out for a receptacle on that wall. It was discovered that in order to mount the mirror, the faucet would have to come off. The outside water pump had never worked and I saw no point in keeping it. Well that lead to "you know, the counter top is sort of really worn" to which the only answer is, "Let's replace it!". Before long the fiddle was off the galley, the sink was out, the teak trim pieces that covered the edges of the counter top were removed, a new piece of Formica was ordered and back to the boat with it all. The hole for the outside water pump was filled with epoxy. The joint between the two sections of counter (behind the stove) was filed with epoxy and sanded flat. To make sure I cut the Formica right, I made a template of the counter of top was made by taping pieces of paper together. This was taped to the Formica and cut with a fine tooth circular saw. The template worked like a charm and the Formica fit like a glove. I left a little extra on the front edges (which would be routed off), and the cut outs for the sink and icebox were also left large to be routed to size. The Formica was mounted with a contact cement. You apply a coat to both surfaces that are to be mated, wait 10 minutes and then put them together. That is the simple version. When it comes to to mating the surfaces together, it should be done starting at one end, working your way up - making sure there are no air bubbles. I used sections of 1/4 dowels to support the Formica off the countertop until I was ready to attach that section. A roller was used to help squeeze any air bubbles out. The pictures below the galley before and during the project. Finished pictures should be available shortly.
|
|
Please address general comments to web@dv-fansler.com This page was last modified:
01/22/14 |